
 This has to be one of my favorite folding techniques! I love the playful whimsy it brings to an Easter or spring table and have yet to come across someone who didn't just love it!
So without further ado lets fold some bunnies :)
 |
| Start with a square napkin. |
 |
| Fold in half to create a rectangle. |
 |
| Fold in half again to create a long rectangle. |
 |
| Fold the left side down at the mid-point. |
 |
| Fold the right side down at the mid-point as well to create an arrow shape. |
 |
| Fold the left corner diagonally towards the middle. |
 |
| Fold the right corner diagonally towards the middle to create a square. |
 |
| Fold the left side up at an angle to create half a kite shape. |
 |
| Fold the right side up to mirror the left and to finish the kite shape. |
 |
| Carefully flip the napkin over. |
 |
| Fold down the top of the napkin, should be even with the folds on the back. |
 |
| Carefully flip the napkin back over keeping the flat side facing you. |
 |
| Fold over the left side of the base to about the mid-point. |
 |
| Carefully fold back the right portion of the base and tuck the corner into the fold of the left side. |
 |
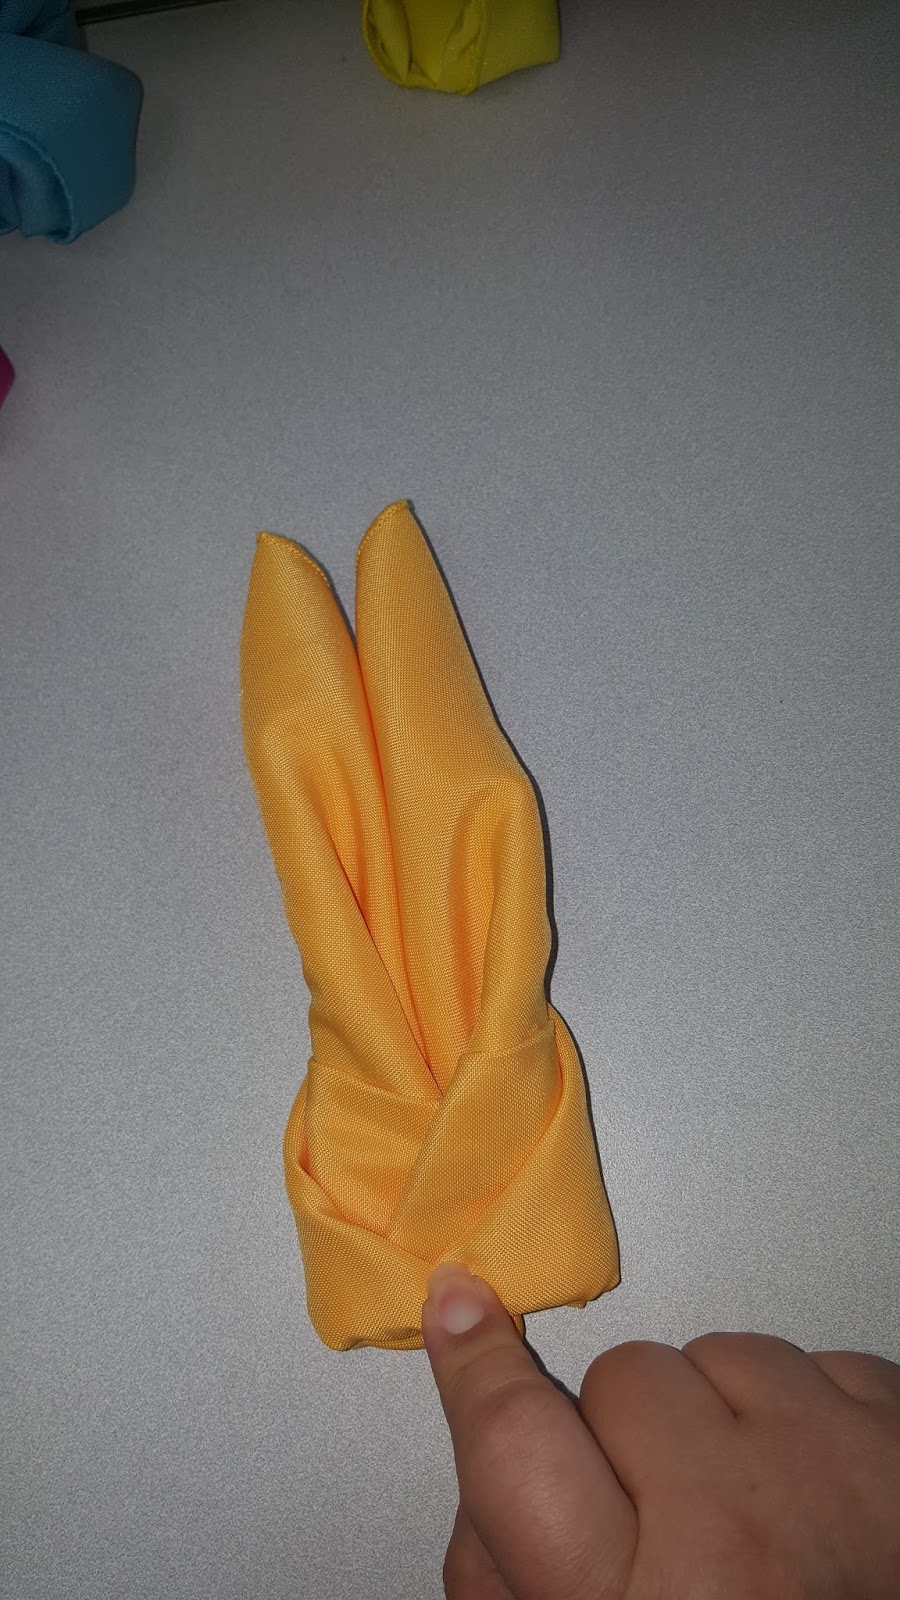
| If needed you can secure this shape with a small rubber band. |
 |
| Front view showing the rubber band holding the napkin together. Carefully tuck the rubber band behind the front part of the napkin. |
 |
| Fluff the front and ears as needed. |
 |
| Back view showing the rubber band. |

I hope you have enjoyed this tutorial - we would love to see your bunny creations as well! Stay tuned to see our bunnies in-cooperated into our Easter inspirational table.
No comments:
Post a Comment